


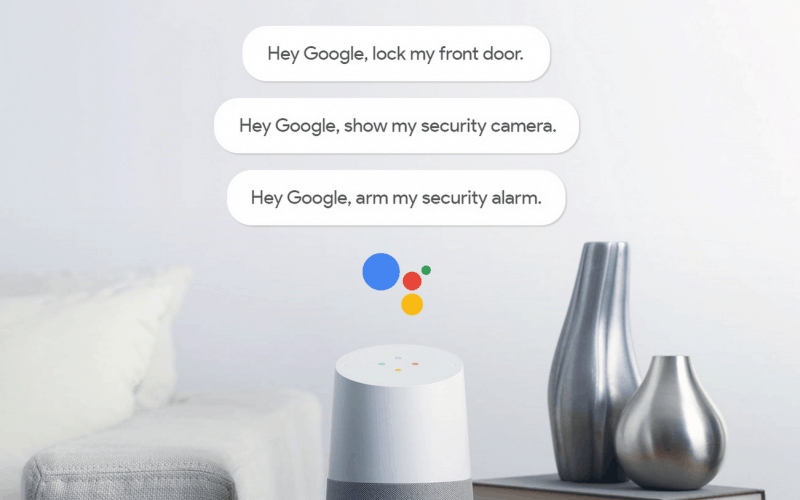
If you like using voice to run your home automations, Google Assistant could be a good option. Most people don’t know that you can actually go beyond Google Assistant native support and build your own triggers and custom voice commands. I will cover two approaches in this article – an easy one using IFTTT and a more advanced one using IFTTT webhooks and Home Assistant.

Simple approach – IFTTT
If your device is supported by IFTTT, this might be the easiest path to build the automation. IFTTT supports custom voice commands for Google Assistant that works even without identifying the IFTTT app in your command. You simply say “Hey Google, [your trigger phrase]” and Google will know that this phrase should trigger a pre-defined IFTTT script. It is even possible to define Google’s response to your trigger. You can set the trigger as a simple phrase (with two alternative ways to say the same command) or include number and text variables that can be passed on to the next step of the script. The only constraint is that you are not allowed to use the phrases Google reserved for its own apps. Here are a few examples I managed to build with IFTTT:
- Say “Start Xbox” to launch Harmony Hub activity which controls TV, AV receiver and Xbox console
- Say “Set Ecobee away” to change Ecobee thermostat mode to away
- Say “Pause Sonos” to pause all Sonos speakers
- Say “Start watering the garden” to trigger Rachio sprinklers for X minutes (unfortunately, it is not possible to pass the number of minutes as a variable)
- Say “Arlo, start recording” to begin recording on your Arlo camera
All of these are really easy to set up and work surprisingly well. I have never had issues with delays or launching wrong commands. IFTTT is free, so definitely give it a try.
Advanced approach – Home Assistant + IFTTT
IFTTT can be used also as a trigger for any Home Assistant automation. To do this, you will need to call a webhook which means your Home Assistant instance is exposed to the internet. The easiest and most secure way to set it up is by using Nabu Casa (31-day trial and after this $5/month). Here is a simple example of how you can use Google Assistant to update your Home Assistant shopping list (note: activate “Shopping List” in Home Assistant under “Integrations” before you begin):
- First, add “IFTTT” integration in your Home Assistant under
Configuration > Integrations > + - Second, create the webhook under
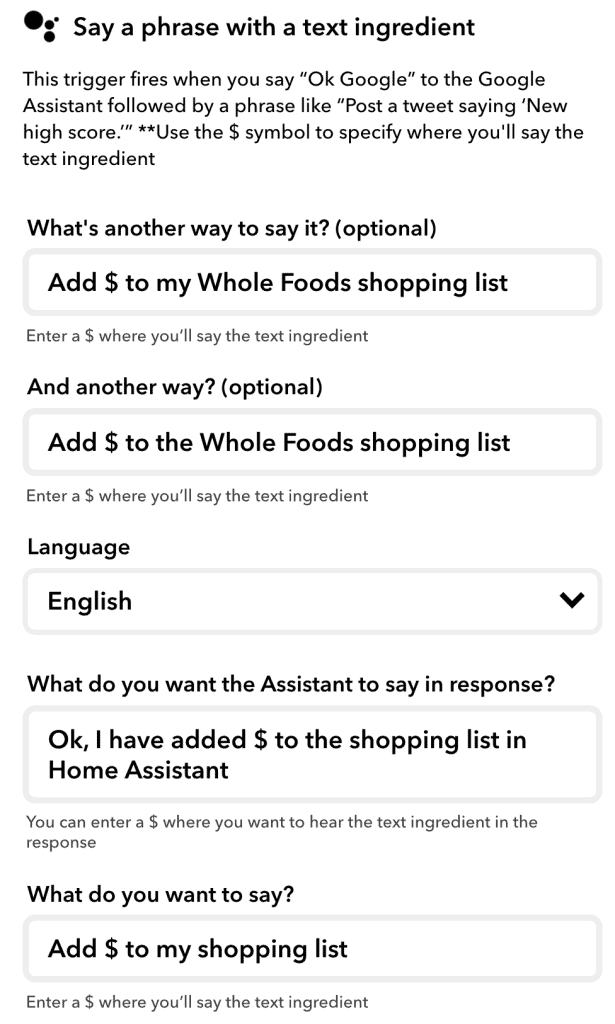
Configuration > Home Assistant Cloud. Look for the Webhooks section at the bottom and enable the IFTTT webhook. Home Assistant should display a public URL that starts withhttps://hooks.nabu.casa/...(copy this URL, we will need it later in the process) - Go to IFTTT.com and create a new applet. Choose Google Assistant as the trigger and select “Say a phrase with a text ingredient”. Define what you want your trigger phase to be and what you want Google Assistant’s response to be (see an example screenshot below).
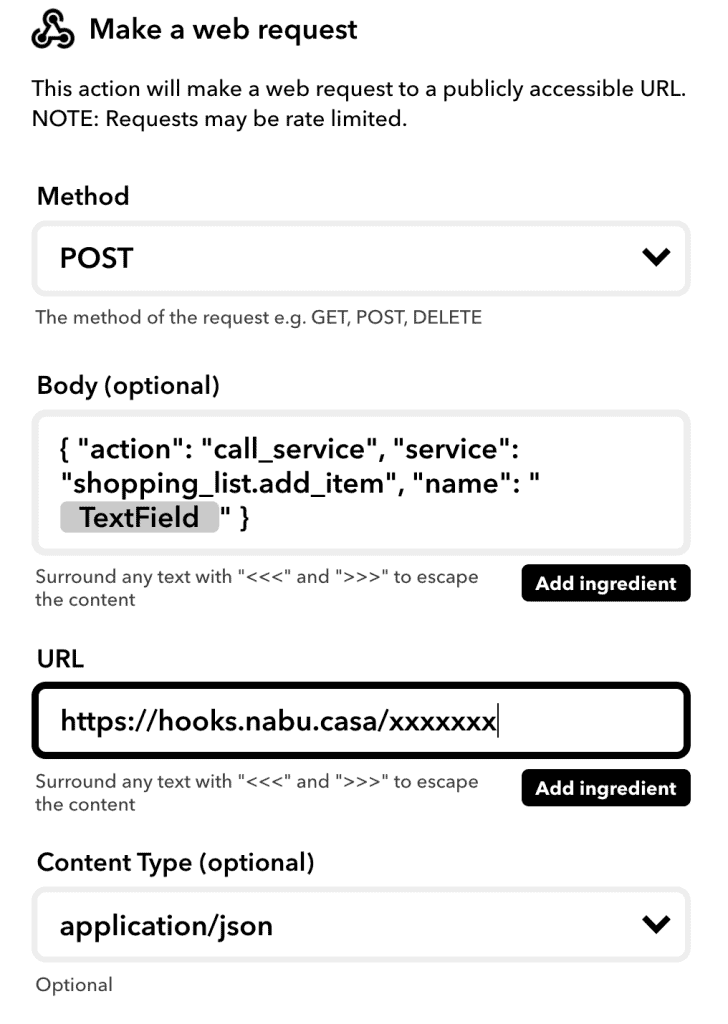
- For the action, choose Webhook and define the method as “POST” and content type as “application/json”. For body, we will call a service named “shopping_list.add_item” (see screenshot below) and pass a variable called “name” (which will be equal to our previous variable $). Finally, for URL, use your Nabu Casa webhook URL that we generated in step 2.
- In the final step, we need to create new automation in Home Assistant with the following script:
  alias: IFTTT Shopping List
  trigger:
  - event_data:
      action: call_service
    event_type: ifttt_webhook_received
    platform: event
  condition:
  - condition: template
    value_template: '{{ trigger.event.data.service == ''shopping_list.add_item'' }}'
  action:
  - data_template:
      name: '{{ trigger.event.data.name }}'
    service_template: '{{ trigger.event.data.service }}'
  mode: single
Now you should be all set, try triggering the action by saying “Hey Google, add beer to my shopping list” and see if it works.


It is well explained, but HA has changed and we have in automations a trigger called webhook. I tried to use the tutorial and I couldn’t, because I don’t use nabucasa I have a working url, but I couldn’t use it. Can you give me any tips using this new webhook trigger feature?
Unfortunately, Google is taking away this functionality, so it won’t be possible to use custom commands going forward. I haven’t found any other workaround.