


If you are running any self-hosted applications on your home network, you probably constantly weigh the pros and cons of enabling remote access. VPN has been the preferred solution for most home setups, but one could argue that VPN is far from the user-friendly ideal. Recently, Single Sign On (SSO) became a very common alternative for enterprise customers and I wanted to explore ways to bring this functionality to my home setup with Synology NAS. Thankfully, some SSO providers have introduced free developer accounts that are perfect for small teams. This tutorial will walk you through the necessary steps to secure your remote server access with a combination of these providers.
Why Single Sign On (SSO)?
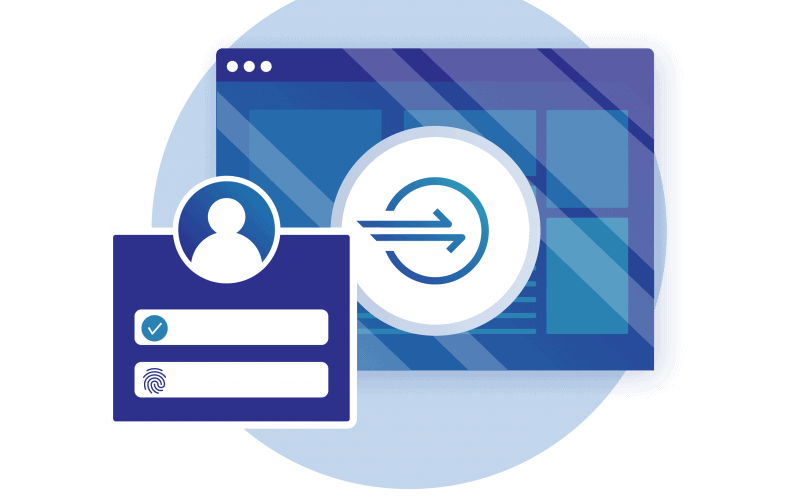
SSO enables users to log in just one time with one set of credentials and get access to all enabled apps. SSO typically does not require any additional apps, certificates, or complicated installations – everything runs via a web browser. Moreover, SSO also makes the job easier for admins who have one central system that manages user accounts, assigns and removes access to specific apps and monitors risk. The market for enterprise SSO services is very competitive and expected to hit $1.6 billion in revenue by the end of 2021. Most popular providers include Okta, OneLogin, AWS SSO and Azure AD SSO.
What you will need for this recipe
- Own domain name – You will need access to a domain name (e.g. yourdomain.com) with the ability to change DNS records
- Free account with Cloudflare (and possibly other providers)
- Server with a reverse proxy – You will need a destination server (e.g., Synology NAS) with self-hosted applications and reverse proxy
DISCLAIMER: Free / Developer accounts are typically intended for testing and trial purposes. Please review the Terms & Conditions for each provider to make sure your use case is allowed under their terms.
1. Set up Cloudflare Access
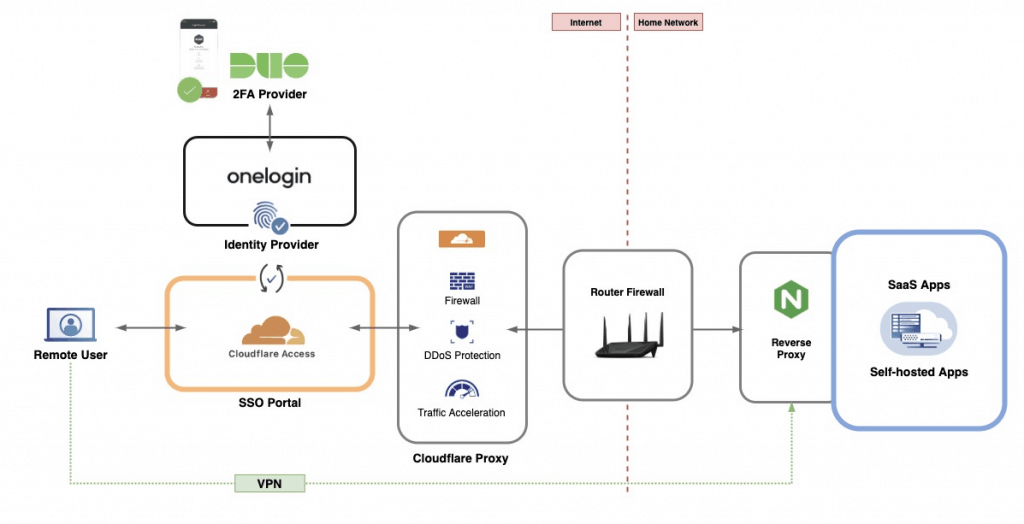
Cloudflare is well-known for its proxy and CDN capabilities, but they have recently expanded into other products. In January 2020, Cloudflare introduced Cloudflare Access which acts as a gateway for cloud and self-hosted applications. This is how you get started:
- Create a free Cloudflare account and set up add your domain to Cloudflare (detailed instructions). You will have to point your domain to Cloudflare servers which will point anyone accessing your domain to Cloudflare servers first.
- In your Cloudflare Dashboard, click on “Teams” on the right side and sign up for Cloudflare Teams Free. You will have to insert your credit card number, but Cloudflare won’t charge you anything as long as you stay on the Free plan (up to 50 users).
- Under Teams Dashboard, enable Cloudflare Gateway and Cloudflare Access. You will be asked to create a unique name (Auth domain) for your integration (e.g., https://your-name.cloudflareaccess.com/).
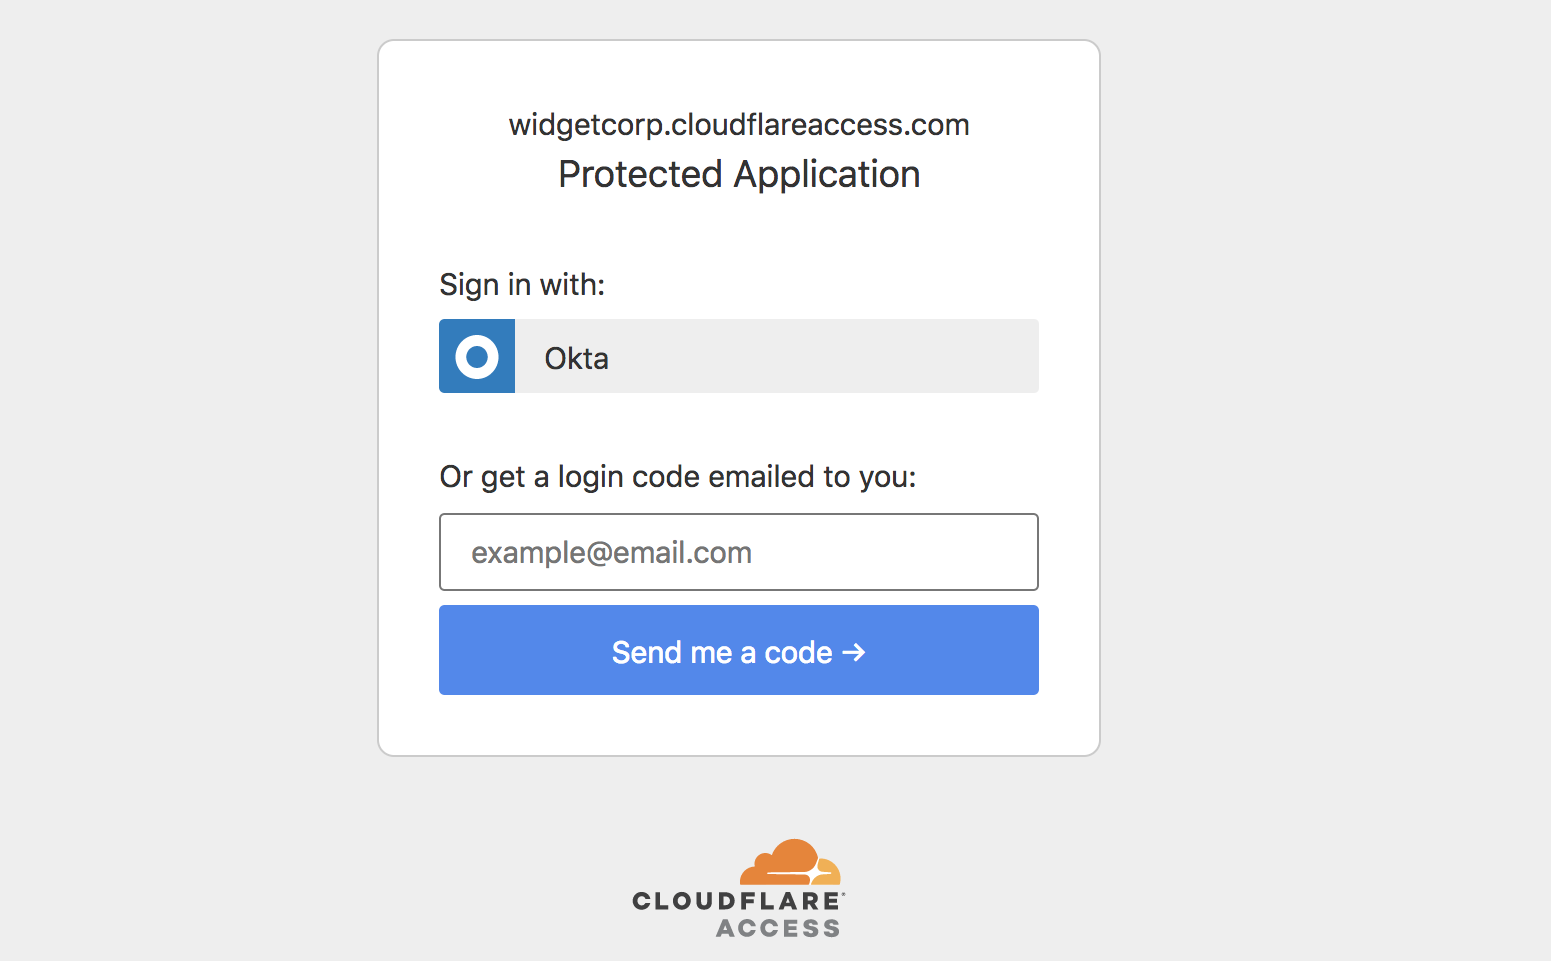
2. Choose your identity provider
Next, you will need an identity provider that will help Cloudflare identify your users. You can find this setting under Teams Dashboard > Access > Authentication. There are few options available:
- By default, Cloudflare enables “One-time PIN”. This will allow the user the request a PIN delivered via email every time they want to log in (as long as their email address is allowed to access this application). This is a very basic access measure and I would not recommend it for the protection of sensitive data.
- You can also leverage logins from third-party websites such as Facebook, Google, Linkedin, and GitHub. This integration will be as secure as those accounts are. If your users are using strong passwords and 2FA, this could be a good user-friendly option. However, you have no way to set and enforce these security policies.
- My preferred option is using a dedicated identity provider (IdP) such as Okta or OneLogin. These providers will allow you to set very granular password policies, require 2FA from all users and log all activity. OneLogin offers a free developer account which is perfect for this use case and supports up to 3 applications and 25 users.
Finally, you should consider different 2FA options. Most of these providers offer standard OTP 6-digit codes, but I personally prefer using Duo Security Free Plan. Duo can integrate with many IdP providers and display a notification on the user’s mobile device to confirm the login. No codes necessary, just quick, simple, and secure.
3. Enable DDNS updates (optional)
Cloudflare needs to know where to point to all incoming traffic. The advantage is that Cloudflare will act as a proxy and hide your IP from possible attackers. If you have a static IP, simply fill that IP into Cloudflare DNS record under CNAME.
For dynamic IP addresses, you will need a DDNS provider to update Cloudflare when your IP address changes. For my Synology NAS, many DDNS options are pre-configured, but Cloudflare is not one of them. I found the best way to update Cloudflare is using a service called DNS-O-Matic which comes preconfigured in Synology DSM. Pick Cloudflare as a service provider, enter your API token (this has to Cloudflare Global API token), and set hostname as “dynamic” and domain as your domain. Finally, in Cloudflare under DNS, create a new record A-type record with the name “dynamic” and point all your other CNAME records to “dynamic.yourdomain.com”. If everything went well, you should see your IP address listed under Cloudflare DNS records.
4. Forward ports and set up reverse proxy
So now Cloudflare knows where to send the traffic, but you still need to set up routing inside your network. On your main router, you should forward ports 80 (HTTP) and 443 (HTTPS) to your server IP address (e.g., Synology NAS). If you are running a single self-hosted application on this port, you are likely going to be fine and you won’t need to do anything else.
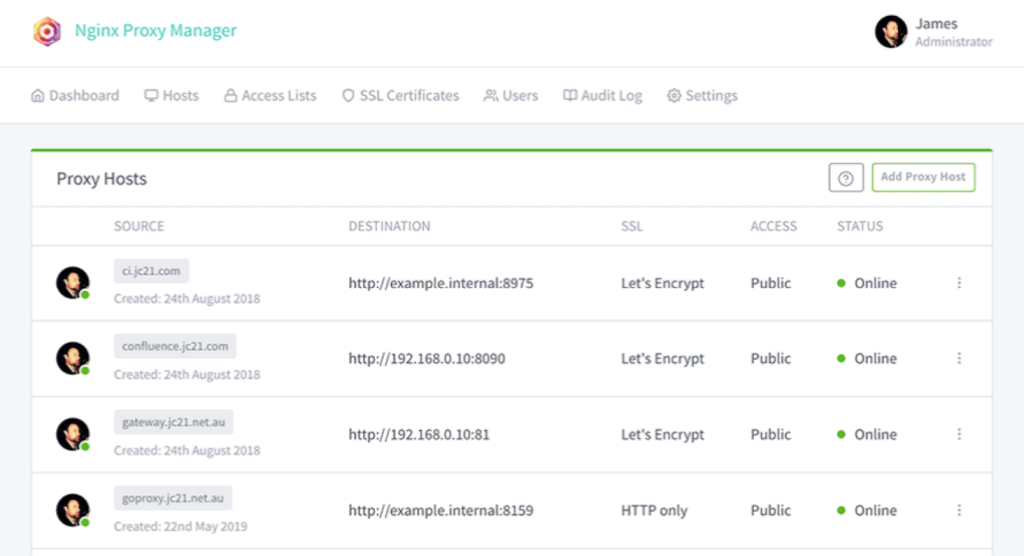
However, many of us run a number of Docker containers and other applications and that’s where reverse proxy comes into play. If you are building this for Synology NAS, the good news is DSM already has a reverse proxy built-in. Just go to Control Panel > Application Portal and set up your rules. The source will be the incoming URL managed by Cloudflare (e.g., https://app.mydomain.com/) and Destination is your ”localhost:port“ or ”IP:port” destination inside your network).
For other servers, you will have to install another proxy server. One of the most popular dockerized packages is Nginx Proxy Manager.
5. Create first SSO application
Now you should be ready to create the first SSO application under Cloudflare Access. It is a fairly simple process – under Teams Dashboard > Access > Applications click “Add an application”. Select ”Self-hosted” and point Cloudflare to an existing domain you want to use for this application (e.g., app.mydomain.com). You can also upload a custom logo and specify which IdP should be used for this application.
Finally, you need to specify which users can access this application. Cloudflare offers many rule variations including certificates, service tokens, and IP ranges. For a simple start, just select Include > Emails and type in your email address. Later on, you can create user groups under “My Team”.
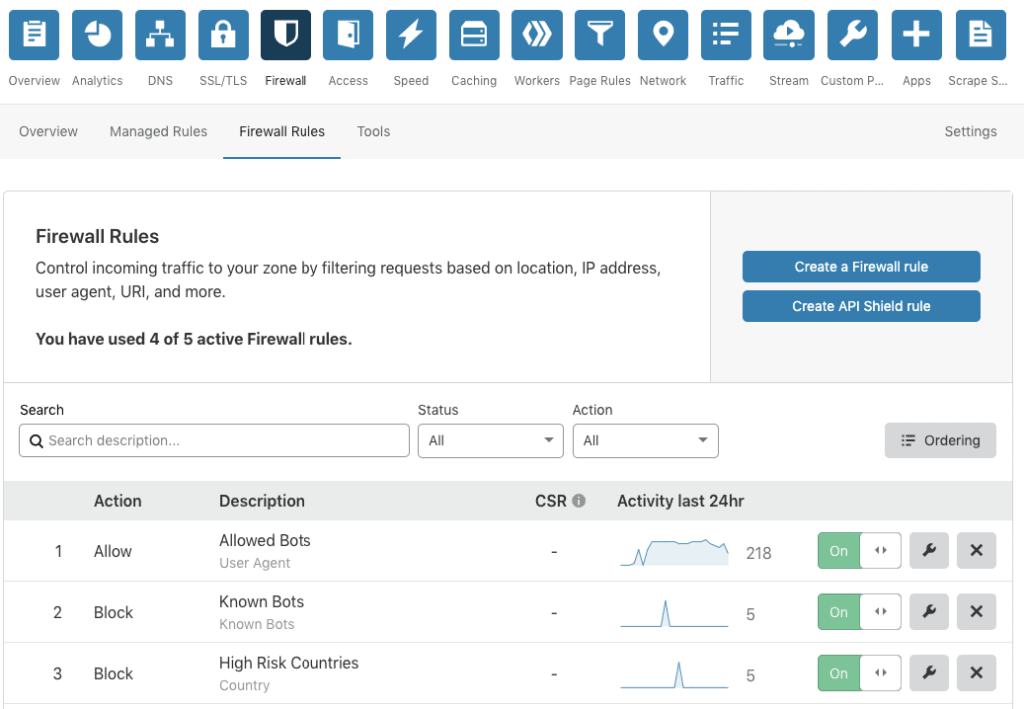
6. Adjust Cloudflare firewall settings (optional)
Finally, you should consider leveraging the Cloudflare firewall to step up your network security. Since all incoming traffic will pass through Cloudflare, you can stop any unwanted visitors before they hit your router’s firewall. As an example, I would recommend using these rules and settings:
- Firewall Rules:
BLOCKKnown BotsBLOCKForeign Traffic:Country does not equal
- Other Settings:
- Bot Fight Mode:
ON - Security Level:
HIGH - Challenge Passage:
30 MINUTES - Browser Integrity Check:
ON - Privacy Pass Support:
ON
- Bot Fight Mode:
Ready to go
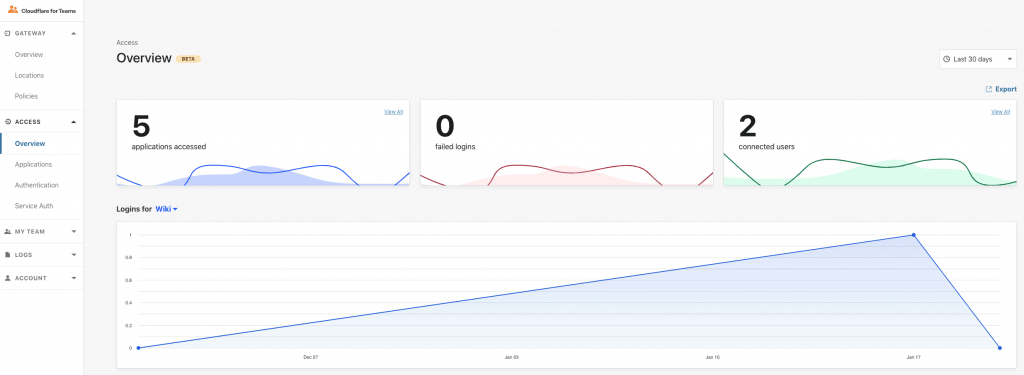
Now you should be ready to test remote access via Cloudflare Teams. Your user dashboard is available via your chosen auth domain (e.g., your-name.cloudflareaccess.com). As an alternative, you can point your browser directly to your app (e.g., app.mydomain.com). In both cases, the login window should appear and it will require your credentials before forwarding the request to your home server.